Freezing taro root is a great way to preserve its freshness and extend its shelf life. Taro, a starchy tuber used in various cuisines, is known for its nutty flavor and versatility. In this comprehensive guide, we’ll explore everything you need to know about freezing taro root, including preparation, storage methods, and tips for maintaining its quality.
1. Understanding Taro Root
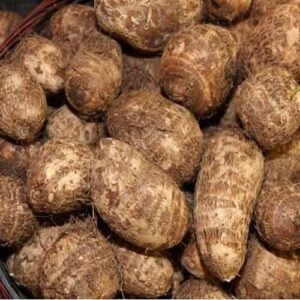
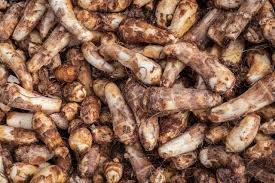
Taro (Colocasia esculenta) is a tropical root vegetable prized for its nutritional value and culinary uses. Originating from Southeast Asia, taro is rich in dietary fiber, vitamins (such as vitamin E and vitamin B6), and minerals (including potassium, magnesium, and iron). It has a unique taste and texture, often described as nutty and earthy.
2. Benefits of Freezing Taro Root
Freezing taro root offers several advantages:
- Extended Shelf Life: Freezing helps preserve the taro root for months, reducing waste and ensuring you have this versatile ingredient on hand when needed.
- Convenience: Having pre-prepared taro root in the freezer allows for quick and easy meal preparation.
- Preservation of Nutrients: Freezing helps retain the nutritional content of taro root, ensuring you continue to benefit from its health advantages.
3. Preparing Taro Root for Freezing
Proper preparation is crucial for maintaining the quality of frozen taro root. Follow these steps to ensure optimal results:
3.1 Selecting and Cleaning Taro Root
- Choose Fresh Taro: Look for taro roots that are firm, free from soft spots, and have a smooth, unblemished skin. Avoid roots with cracks or signs of sprouting.
- Clean Thoroughly: Wash the taro root under cold running water to remove dirt and debris. Use a vegetable brush to scrub the surface if necessary.
3.2 Peeling and Cutting
- Peel Carefully: Taro skin can be tough and slightly hairy. Use a vegetable peeler or a sharp knife to remove the skin. Be sure to wear gloves if you have sensitive skin, as taro can sometimes cause irritation.
- Cut into Pieces: Slice the taro root into uniform pieces, such as cubes or slices. This ensures even cooking and makes it easier to use in recipes later.
3.3 Blanching
Blanching is an important step to preserve the texture and color of taro root:
- Boil Water: Bring a large pot of water to a boil.
- Prepare an Ice Bath: Fill a large bowl with ice water to cool the taro root quickly after blanching.
- Blanch Taro Root: Add the taro pieces to the boiling water. Blanch for 2-3 minutes, depending on the size of the pieces. This helps to inactivate enzymes that can cause spoilage.
- Cool Quickly: Immediately transfer the blanched taro pieces to the ice bath to stop the cooking process. Cool for an additional 2-3 minutes.
- Drain and Dry: Drain the taro pieces thoroughly and pat them dry with paper towels to remove excess moisture.
4. Freezing Taro Root
Once prepared, taro root can be frozen using these methods:
4.1 Freezing in Portion Sizes
- Pre-Freeze Method: Spread the prepared taro pieces in a single layer on a baking sheet. Place the sheet in the freezer and freeze until the pieces are solid. This prevents them from sticking together.
- Transfer to Containers: Once frozen, transfer the taro pieces to airtight freezer bags or containers. Label with the date for easy identification.
- Seal and Store: Ensure the bags or containers are tightly sealed to prevent freezer burn. Store in the freezer.
4.2 Vacuum Sealing
Vacuum sealing is an effective way to prevent freezer burn and maintain quality:
- Prepare the Vacuum Sealer: Set up your vacuum sealer according to the manufacturer’s instructions.
- Package Taro Pieces: Place the taro pieces in vacuum-seal bags, ensuring they are spread out evenly.
- Seal and Freeze: Vacuum seal the bags and store them in the freezer.
5. Cooking Frozen Taro Root
Cooking frozen taro root is straightforward, but it requires some adjustments:
5.1 Thawing Methods
- Refrigerator Thawing: Transfer the taro root from the freezer to the refrigerator and allow it to thaw overnight.
- Quick Thawing: For faster thawing, place the taro root in a bowl of cold water or use the defrost function on your microwave.
5.2 Cooking Frozen Taro Root
- Boiling: Add frozen taro pieces directly to boiling water. Cook until tender, usually 10-15 minutes, depending on the size of the pieces.
- Steaming: Steam frozen taro root for about 15-20 minutes until tender.
- Stir-Frying or Roasting: For stir-frying or roasting, you can cook frozen taro pieces directly from frozen. Adjust cooking times as needed to ensure they are cooked through.
6. Tips for Maintaining Quality
To ensure the best quality of your frozen taro root, keep the following tips in mind:
- Avoid Over-Freezing: Don’t keep taro root in the freezer for too long. While it can be stored for up to 3 months, try to use it within 1-2 months for optimal flavor and texture.
- Label and Date: Always label and date your freezer bags or containers to keep track of how long the taro root has been stored.
- Check for Freezer Burn: If you notice any signs of freezer burn (e.g., dry or discolored patches), trim them off before cooking.
7. Creative Recipes with Frozen Taro Root
Frozen taro root can be used in a variety of delicious recipes:
- Taro Chips: Slice the thawed taro root thinly, season with salt and spices, and bake or fry until crispy.
- Taro Soup: Add thawed taro pieces to soups and stews for added flavor and texture.
- Taro Cakes: Use thawed taro in savory cakes or fritters, mixed with spices and herbs.
- Taro Smoothies: Blend thawed taro with fruits and vegetables to create nutritious smoothies.
8. Common Issues and Troubleshooting
Here are some common issues you might encounter when freezing taro root and how to address them:
- Texture Changes: Taro root may become slightly mushy after freezing and thawing. Blanching helps minimize this issue, but the texture may not be exactly the same as fresh.
- Freezer Burn: Ensure your taro root is properly sealed to prevent freezer burn. If freezer burn occurs, trim the affected areas before use.